


Peşin Fiyatına 3 Taksit 3 x 695,56 TL
Alışveriş Kredisinden Faydalanmak İster misiniz?
Kargo Bilgileri
Ürün Özellikleri
Paket İçi Adet
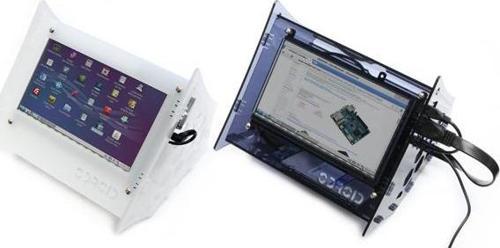
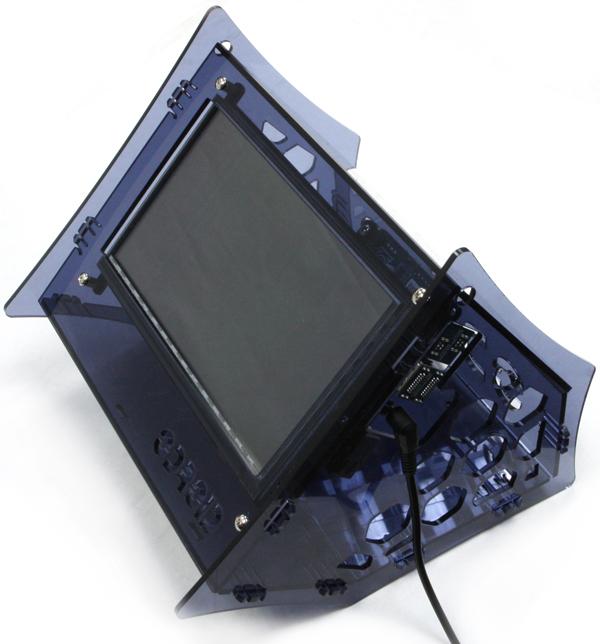
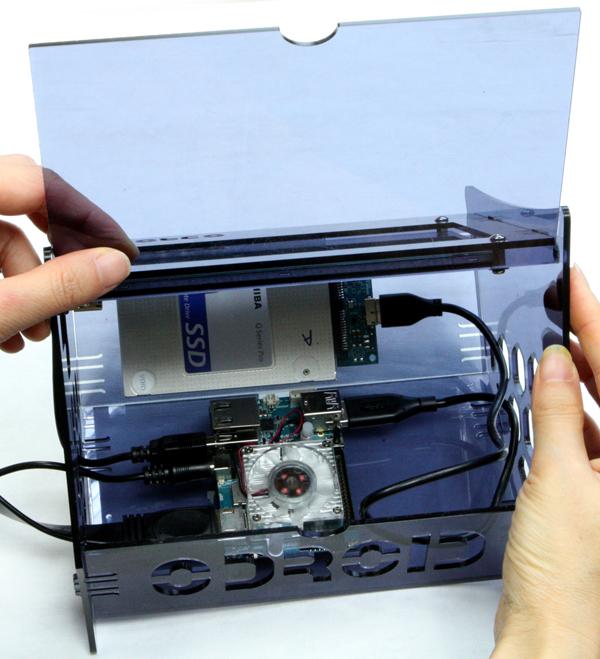
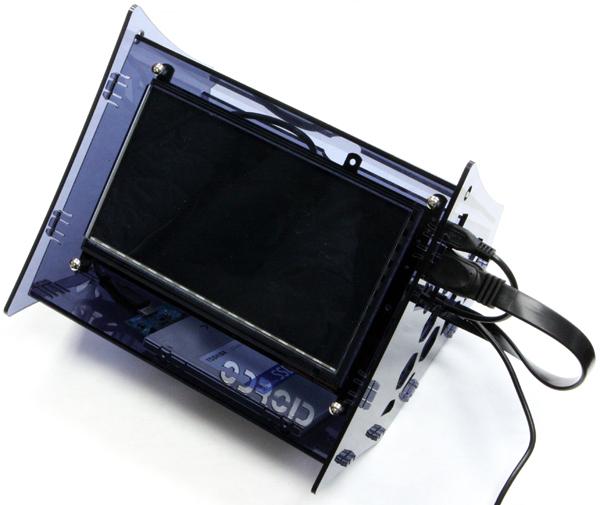
1VuShell, ODROID-VU7 ve ODROID-VU7 Plus için lazerle kesilmiş akrilik bir muhafazadır. Süslü VuShell ile kendi masaüstü bilgisayarınızı yapabilirsiniz. VuShell iki farklı görüntüleme açısına olanak tanır.
Özellikler
VuShell is a laser cut acrylic enclosure for the ODROID-VU7 and ODROID-VU7 Plus.
You can make your own desktop PC with the fancy VuShell.
VuShell allows for two different viewing angles.
TECHNICAL DETAILS
- Dimension : 206 x 206 x 193 mm(approx. assembled)
- Weight : 395g approx.
- Color : Smoky Blue and Smoky White
We have two different color choices. Smoky-Blue and Smoky-White.
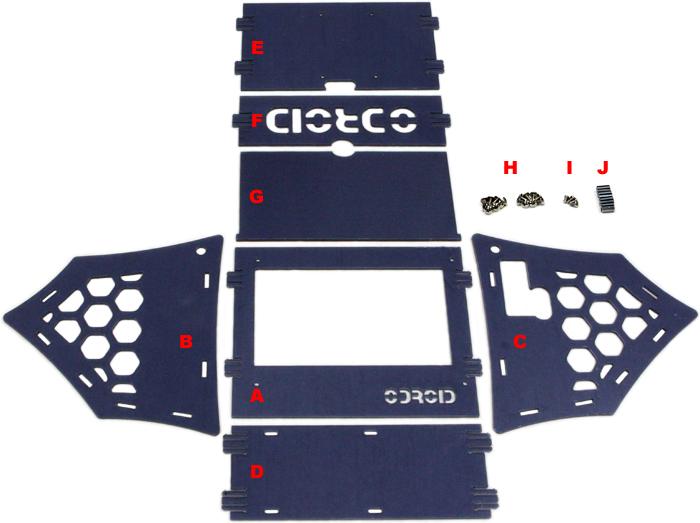 Package include
A. Front piece
B. Left side piece
C. Right side piece
D. Bottom1 piece
E. Bottom2 piece
F. Bottom3 piece
G. Cover piece
H. 16 x 5 mm screws (Philips dual round head, metal)
I. 4 x 6 mm screws (Philips pan head, metal)
J. 8 x 8mm female hex PCB spacers (metal)
- You need a small Philips bit screw driver.
- Laser cut acrylic pieces, screws and spacers are included.
- ODROID-VU7/VU7plus and related accessories are NOT included
Laser Cutting Video
Assembly Guide for ODROID-C1+
Note : Please take all steps with special care. Acrylic pieces are easy to crack.
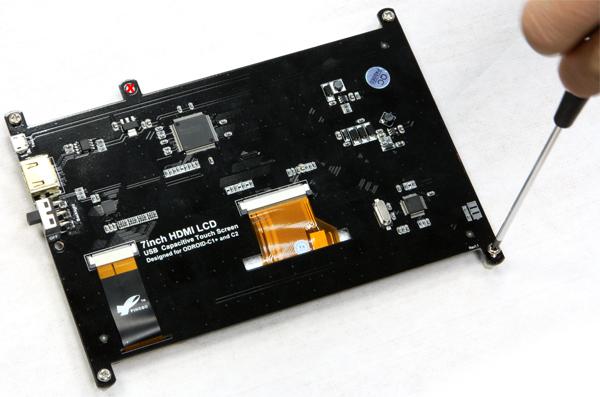
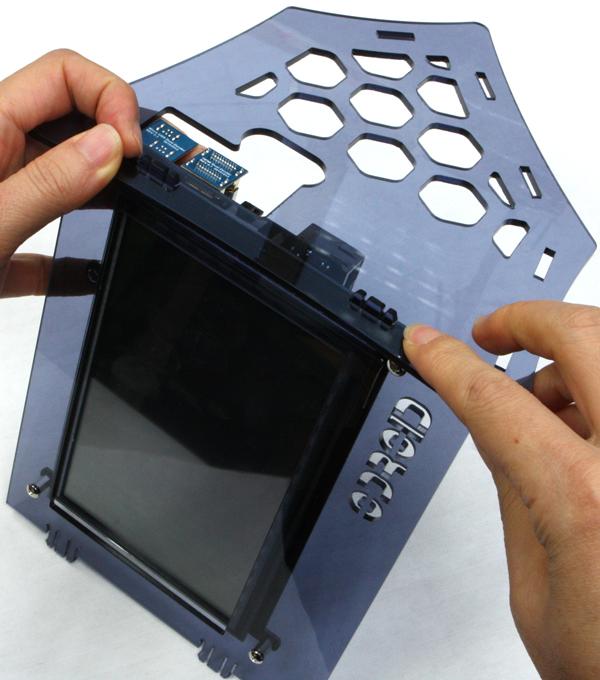
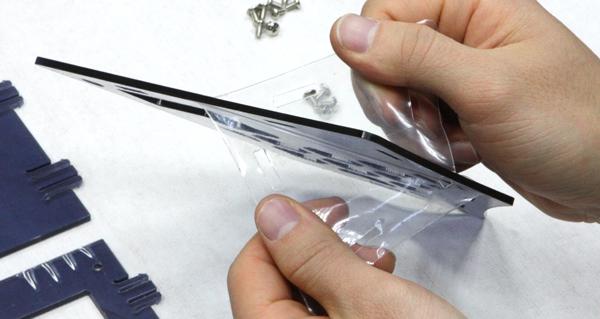 Step 1
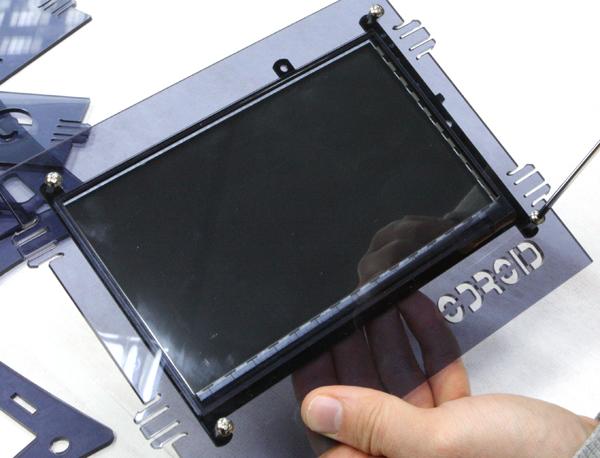
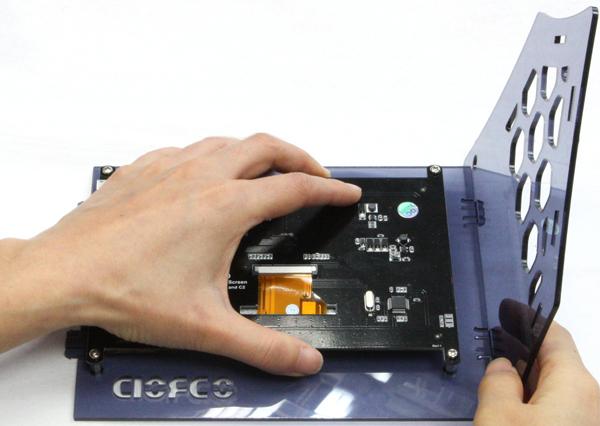
Peel the protective backing off both sides of all the laser-cut parts.
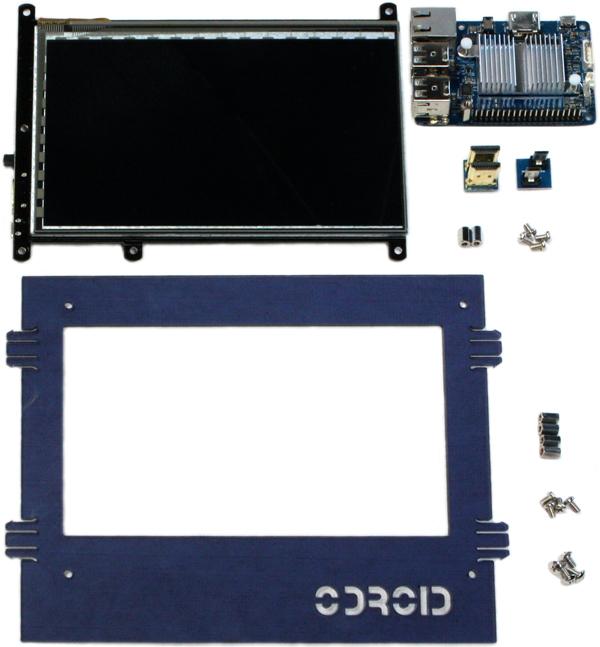 Assemble the front piece first.
 You will need ODROID-VU7 package, (A), 8 x (H), 4 x (J)
 Step 2
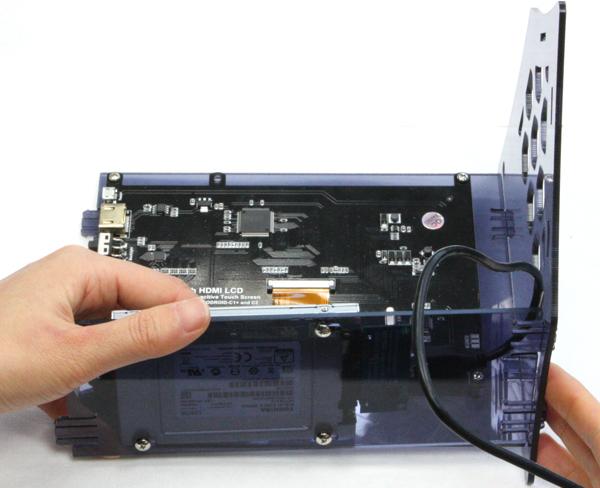
Align a spacer(J) on the bottom side and a screw(H) on the top side. Insert a screw and tighten it carefully.
Keep the screw hole empty at the top middle marked with an X in the picture.
Check Step4 for the other side of the ODROID-VU7.
 Step 3
You need screws and spacers bundled with ODROID-VU7.
Align a spacer on the bottom side and a screw on the top side. Insert a screw and tighten it carefully
You only need to install screws at the 2 points marked with an O in the image.
 Step 4
Continue using the screws from the ODROID-VU7 bundle.
Add screws at the 2 points marked with an O in the image. Insert screws and tighten them gently.
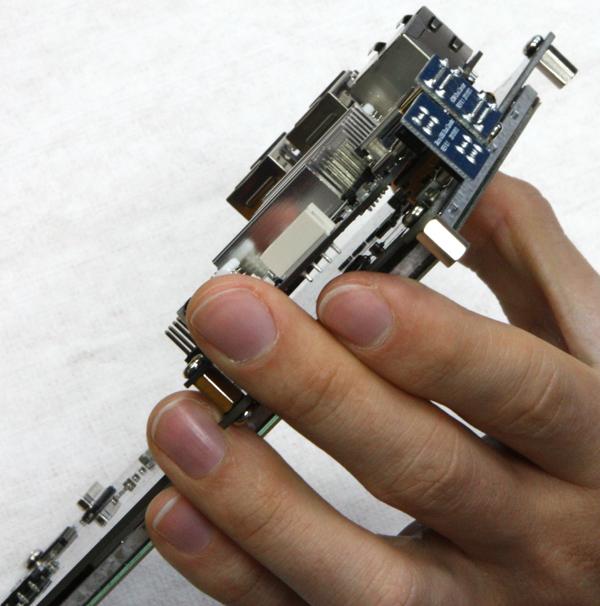 Step 5
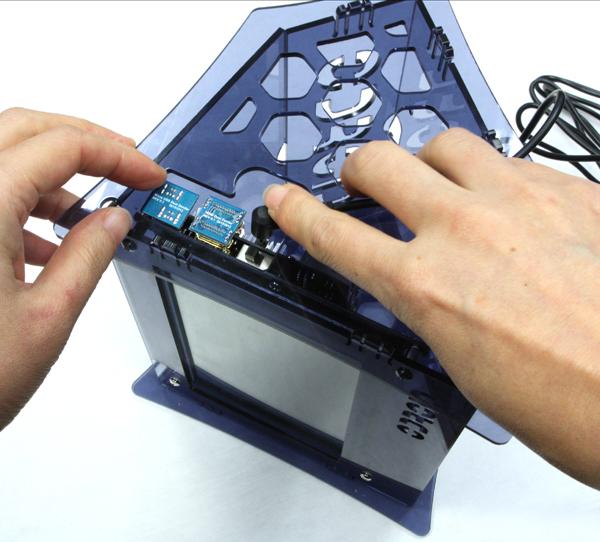
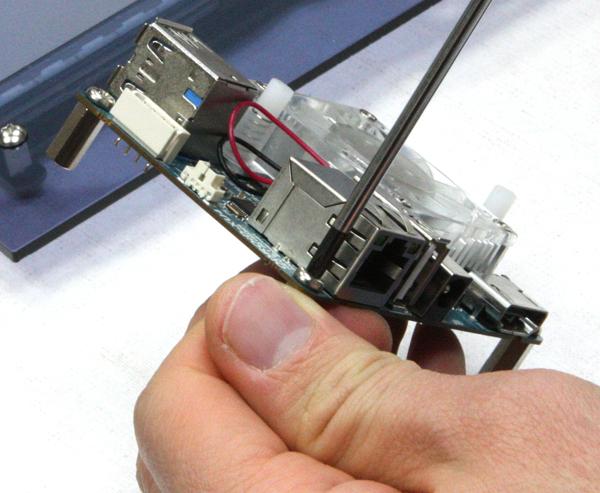
Plug in the Micro USB link board and the HDMI link board.
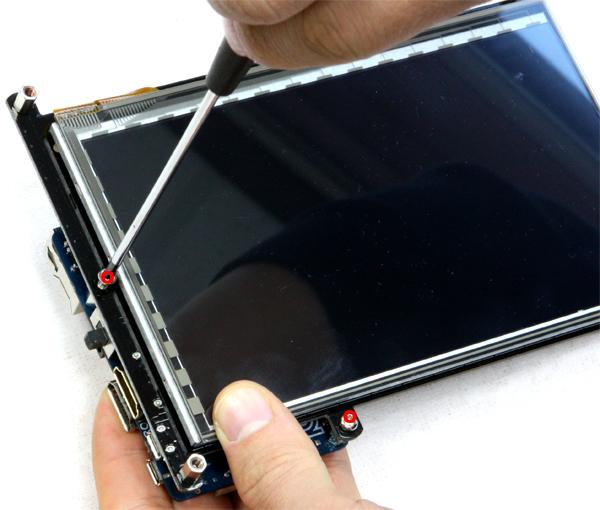
 Step 6
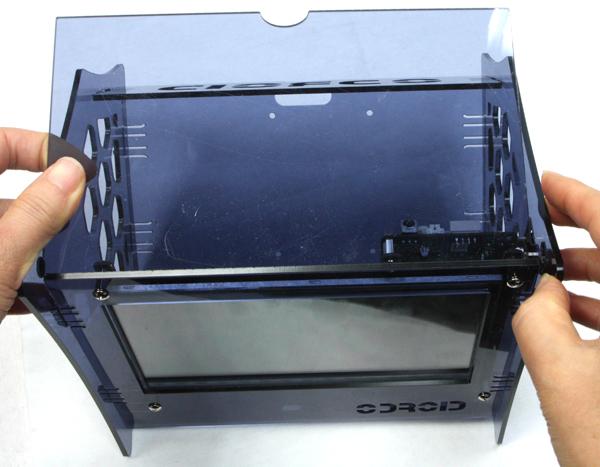
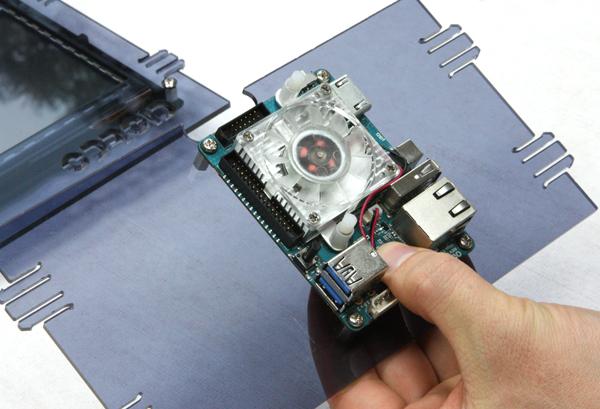
Assemble the front piece(A) with the ODROID-VU7.
You need 4 x (H). Tighten it gently.
Don't tighten too much or the acrylic will crack.
 Step 7
Assemble the front piece(A) and right side piece(C).
Align the locker on the front piece with the locking hole on the right side piece(C). Apply gentle pressure to it.
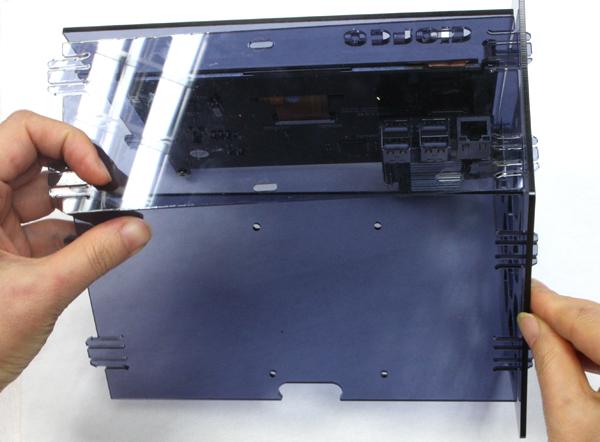
 Step 8
 Assemble the bottom1 piece(D).
Align the locker on the bottom1 piece(D) with the locking hole on the right side piece(C).
Apply gentle pressure to it.
 Step 7
Assemble the bottom2 piece(E).
Align the locker on the bottom2 piece(E) with the locking hole on the right side piece(C).
Apply gentle pressure to it.
 Step 8
Assemble the bottom3 piece(F).
Align the locker on the bottom3 piece(F) with the locking hole on the right side piece(C).
Apply gentle pressure to it.
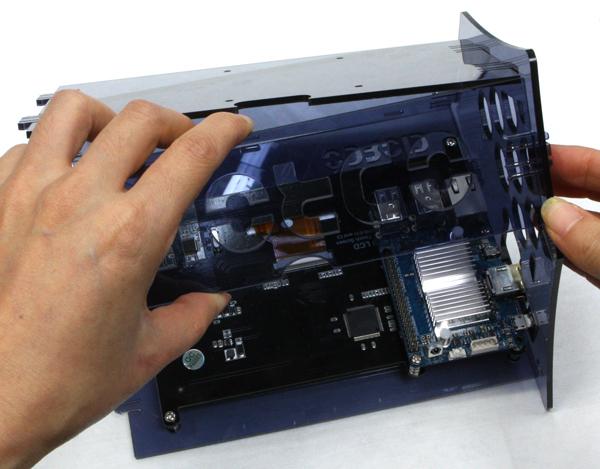
 Step9
Step9Assemble the left side piece(B).
Align the locker on each piece with the locking hole on the left side piece. Apply gentle pressure to it.
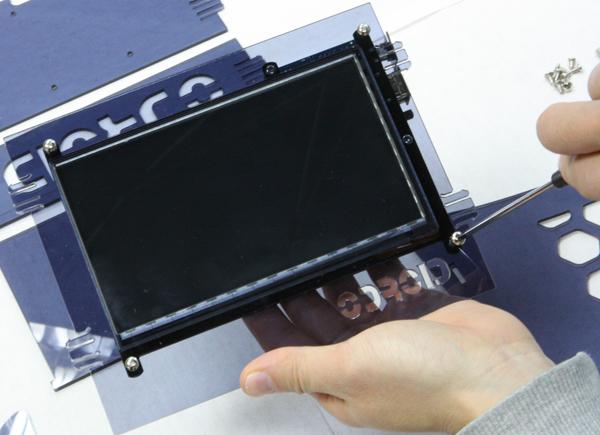
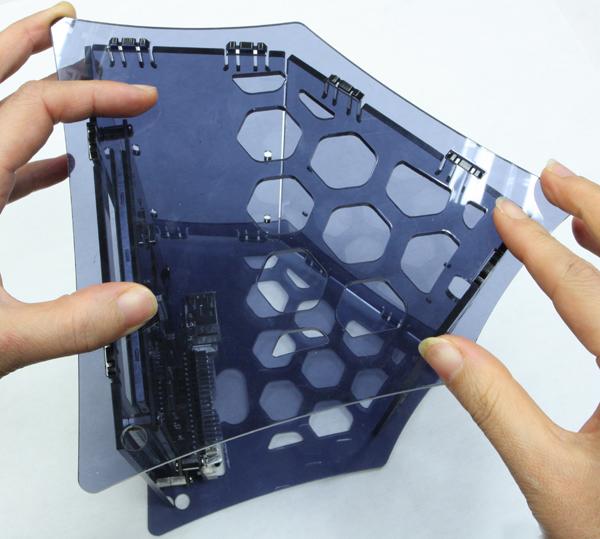
 Step 10
Align the cover piece(G) on the hole with the left side piece(B) and the right side piece(C).
 Step 11
Input the power source.
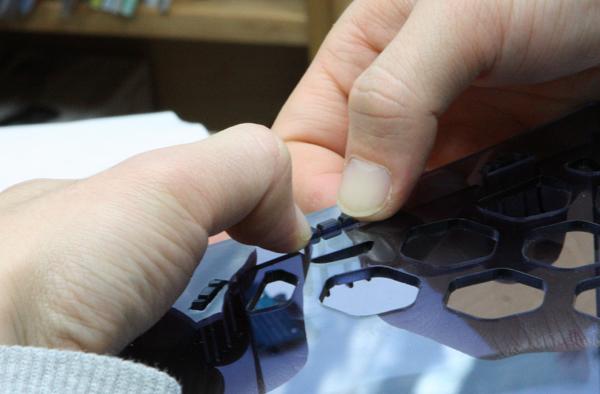 Tip! Unlocking
Pinch the edge of the each locker with two fingers. Please be careful not to crack the locker.
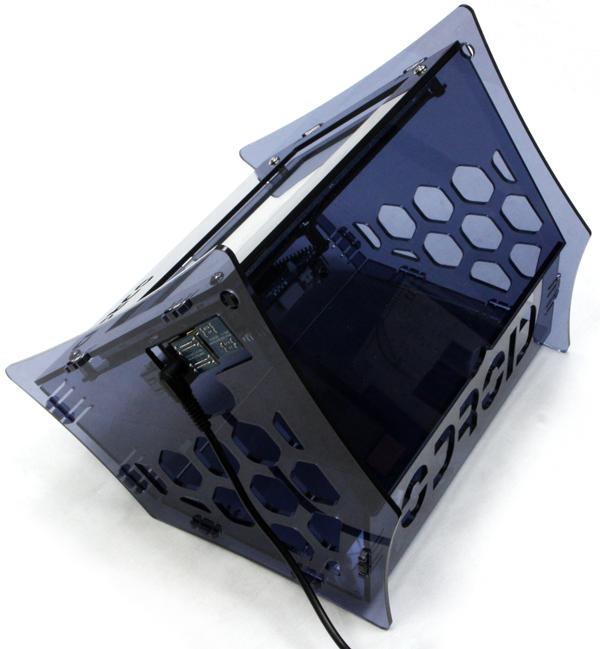 Beautifully honeycomb shaped side and ODROID logo back.
 Ideal 2 step viewing angle.
Assembly Guide for XU4
Step 1
Peel the protective backing off both sides of all the laser-cut parts. Step 2
Align a spacer(J) on bottom side and a screw(H) on top side.
Tighten it gently.
Leave the screw hole empty at top middle marked with an X in the picture.
 Step 3
Assemble the front piece(A) with the ODROID-VU7.
You need 4 x (H). Tighten it gently.
Don't tighten too much or the acrylic will crack.
 Step 4
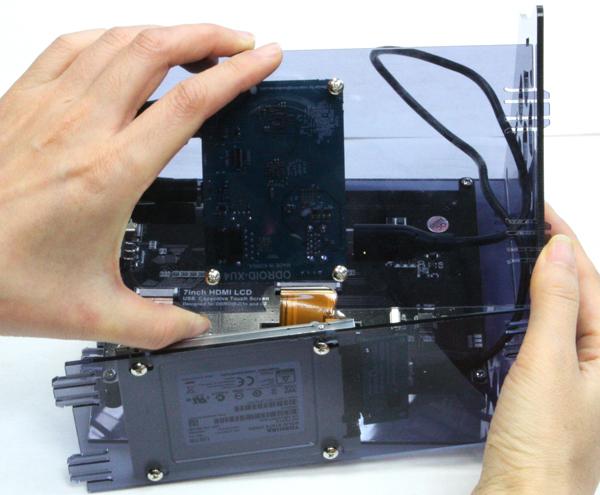
Align a spacer(J) on bottom side of the ODROID-XU4 and a screw(I) on top side of ODROID-XU4.
Insert a screw and tighten it gently.
 Step 5
Align the screw and spacer installed ODROID-XU4 on the bottom piece(E).
 Step 6
Give a screw(H) a few easy turns on bottom side.
 Step 7
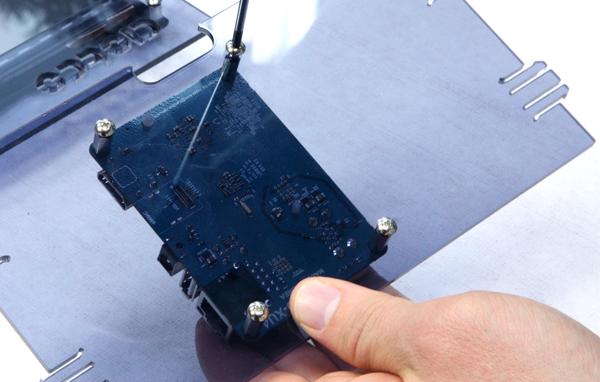
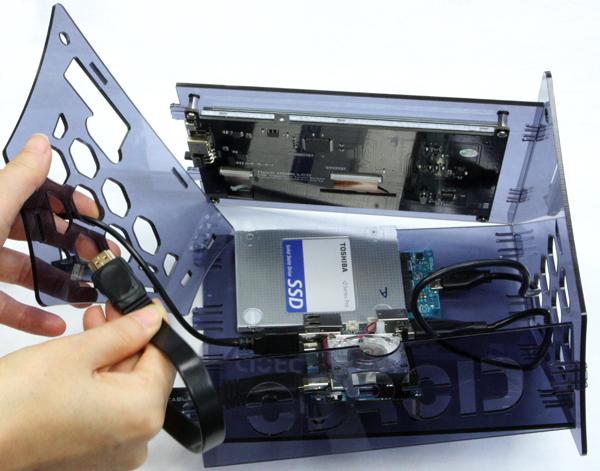
If you do not want to install the SATA drive, please skip to Step 11.
SATA Bridge Board package is not included.
The black rubber rings work as spacers.
Align the center of the black rubber ring on the screw hole of SATA drive.
Standard SATA drives have 4 screw holes. Step 8
Align the screw hole of the bottom1 piece(D) on top.
Give a few easy turn. Please make sure not to tighten it too much. The SATA Bridge board needs 1mm of space between the SATA drive and the bottom1 piece.
 Step 9
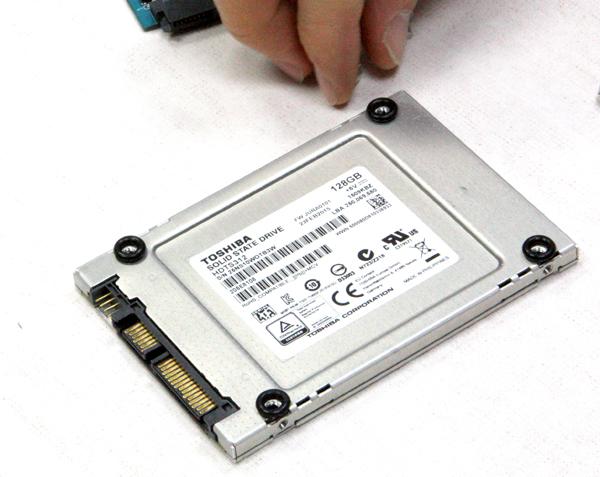
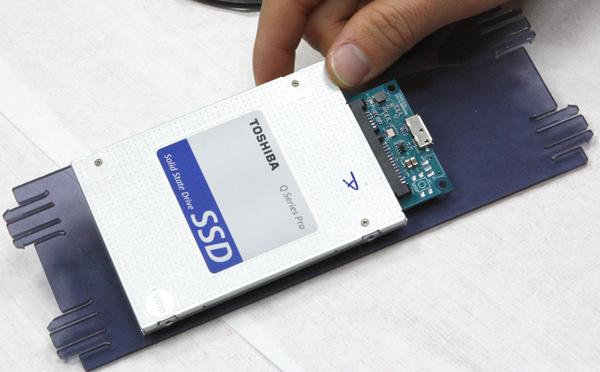
Plug the SATA Bridge board to SATA drive.
SATA Bridge board includes
- SATA Bridge board
- 4 x black rubber rings
- USB 3.0 Cable
 Step 10
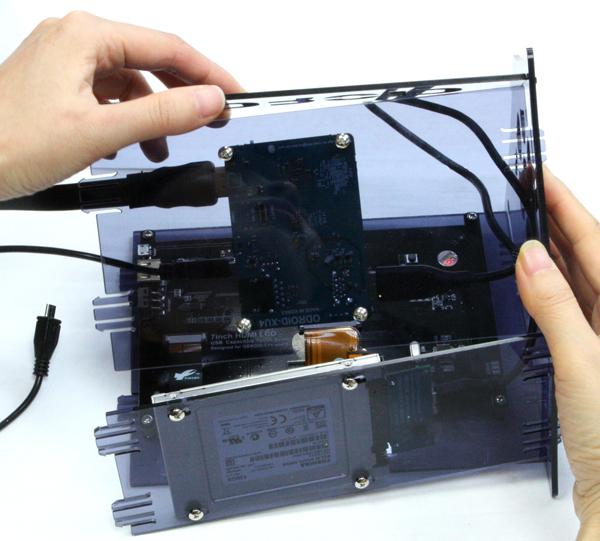
Plug one side of USB3.0 cable to SATA Bridge board and the other side to USB3.0 port on ODROID-XU4.
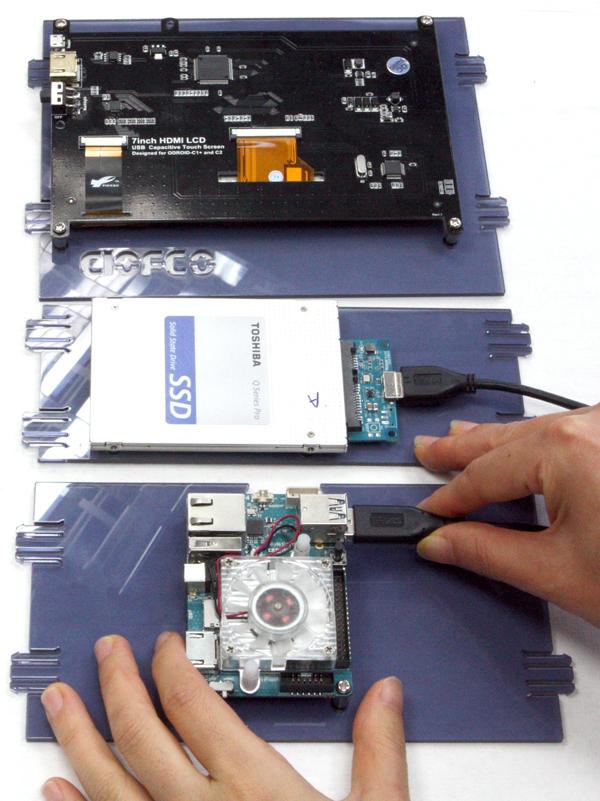
 Step 11
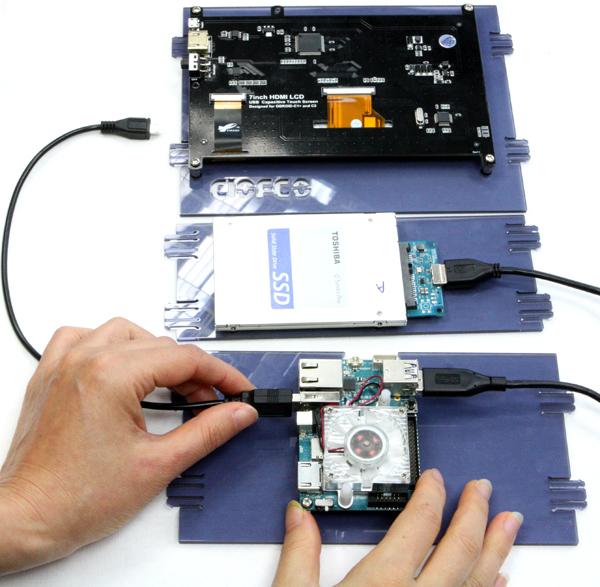
Plug Micro-toTypeA USB Cable to USB port on the ODROID-XU4. The cable is bundled with the ODROID-VU7.
 Step 12
Plug TypeA-to-TypeA HDMI Cable to HDMI port on ODROID-XU4. The cable is bundled with ODROID-VU7.
 Step 13
Assemble the installed front piece(A) with the left side piece(B).
Align the locker on the front piece(A) with the locking hole on the left side piece(B). Hold the front piece(A) and press gently the left side piece(B) with your fingers.
 Step 14
Assemble the bottom1 piece(D).
Align the locker on the bottom1 piece(D) with the locking hole on the left side piece(B).
Press it with your fingers gently.
 Step 15
Assemble the bottom2 piece(E).
Align the locker on the bottom2 piece(E) with the locking hole on the left side piece(B).
Hold the bottom2 piece(E) and press the left side piece(B) with your fingers gently.
 Step 16
Assemble the bottom3 piece(F).
Align the lock on the bottom3 piece(F) with the locking hole on the left side piece(B).
Hold the bottom2 piece(F) and press the left side piece(B) with your fingers gently.
 Step 17
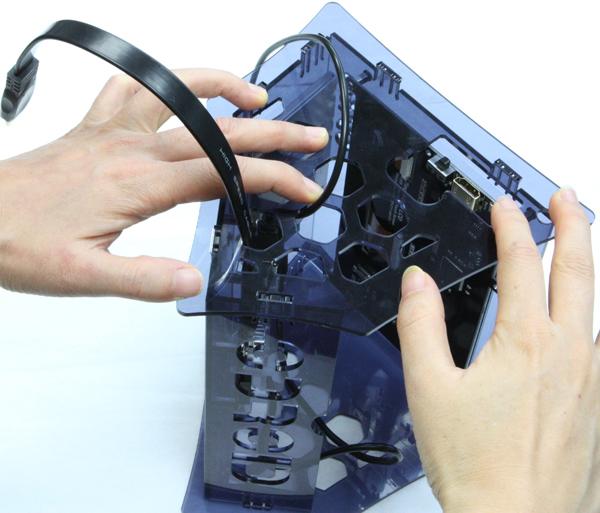
Pass through the HDMI cable and USB cable via honeycombs. Please check the right honeycomb location from the below image.
 Step 18
Assemble the right side piece(C).
Align each locker on each piece with the locking hole on the right side piece(C). And press it gently with your fingers.
 Step 19
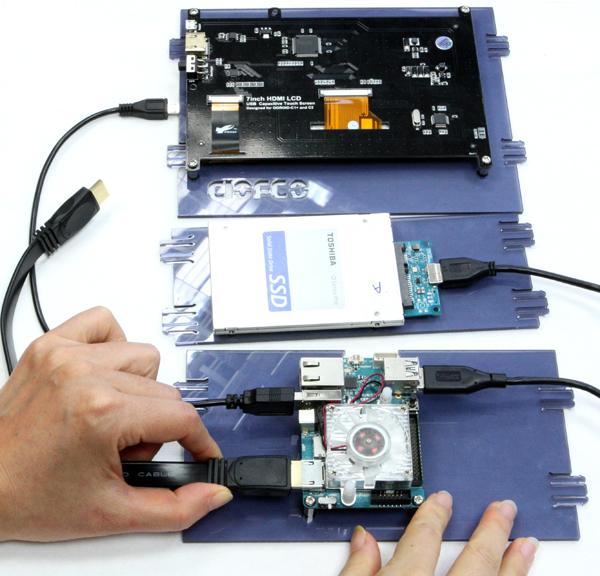
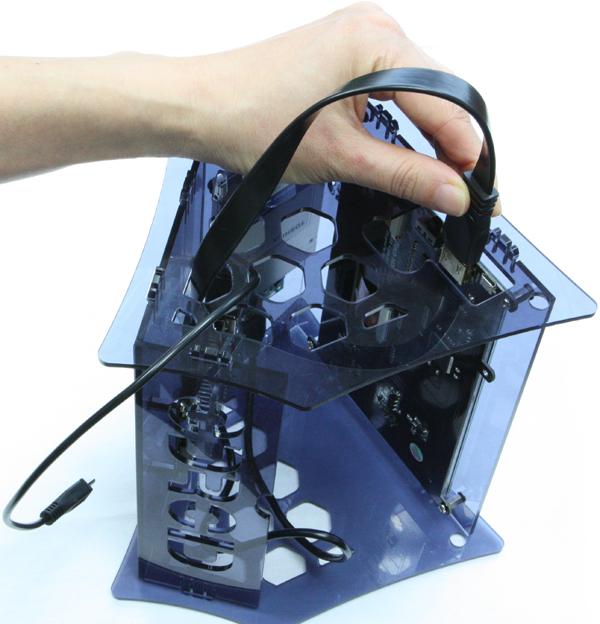
Plug the HDMI cable to the HDMI connector on the ODROID-VU7.
 Step 20
Plug the microUSB cable to microUSB connector on the ODROID-VU7.
 Step 21
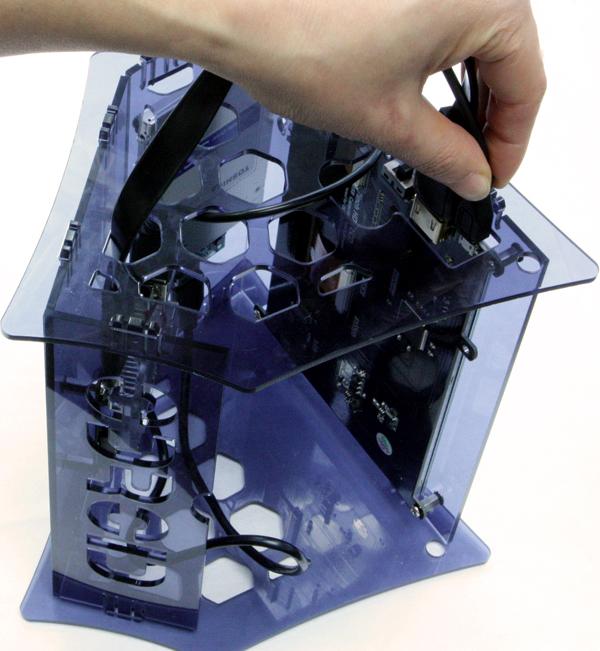
Check that the cables are plugged in correctly.
 Step 22
Check that all the installation is done correctly. Input the 5V/4A Power Supply through one of honeycomb openings.
 Step 23
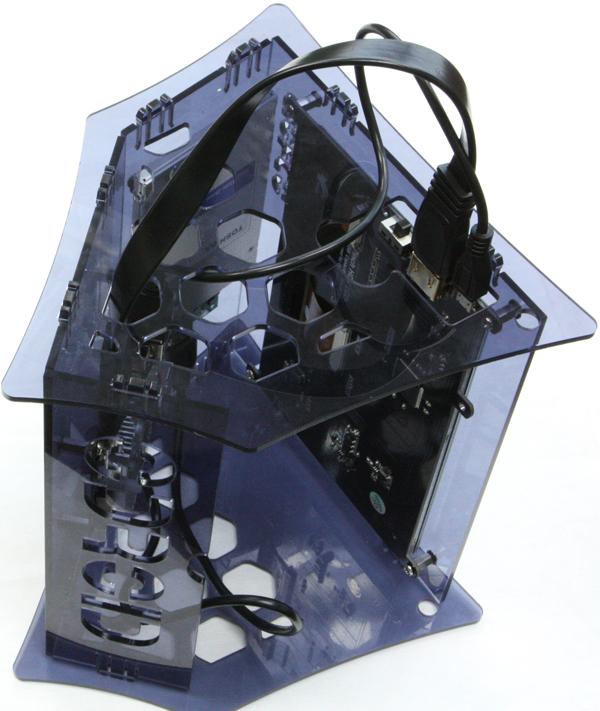
Align the cover piece(G) with the hole on the left side piece(B) and the right side piece(C).
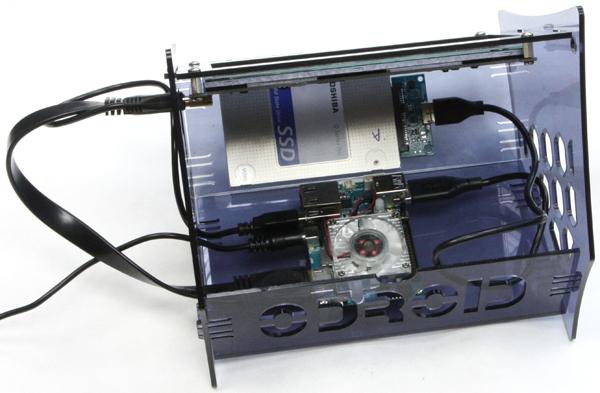
 The desktop version of ODROID-XU4 is here.
Neden idefix?

Siparişinizi teslim aldığınız tarihten itibaren 14 gün içinde iade edebilir, iade sürecinin tamamlanmasının ardındansa ödemenizi hızla geri alabilirsiniz.

Kullanıcı dostu ara yüzümüz tüm ihtiyaçlarınıza eksiksiz yanıt verebilmek için tasarlandı. Deneyiminizi uçtan uca kusursuz kılmak adına çağrı merkezimiz ve canlı destek hattımızla ihtiyaç duyduğunuz her anda yanınızdayız!

Siparişlerinizin bir an önce ulaşması için sabırsızlandığınızın farkındayız. Sunduğumuz farklı teslimat seçenekleri arasından size en uygununu belirlemeniz, siparişinizi olabildiğince çabuk veya dilediğiniz zaman aralığında sorunsuz bir biçimde teslim etmemiz için yeterli.